If you are new to digital crafts, Silhouette Studio is the program you will use most. It is the formal design software of every silhouette cutting machine. It offers features allowing you to design, edit, and personalize your project easily. The Silhouette Studio has challenged materials; no matter which material you are cutting, whether vinyl, cardstock, or fabric, it is enjoyable and straightforward to design.
In this blog, let’s explore everything—from simple tools and interface tips to advanced design features. Are you a first-time user of Silhouette Design Studio or having trouble with the Silhouette Studio Download? Then this is the step-by-step guide for you.
Introduction to Studio Silhouette
Before you start designing, you must be able to install the software accurately. Silhouette Studio download is available on the site’s official page and supports both Windows and MacOS. The free version is simple. It has all the tools you need to start creating. The upgrade options, Designer Edition and Business Edition, provide more advanced features.
What to do to get and use Silhouette Studio:
- Visit the official page of Silhouette Studio.
- Select the correct version that your operating system can read.
- Put the configuration file in place, and run the installer.
- The installation is finished with the help of on-screen instructions.
- Launch Silhouette Studio and log in or make a Silhouette account.
Upon installation, the program opens easily, and the layout has an extensive design area, a left tool panel, and a top setting choice. It is constructed to be very easy to use by both frequent and new users.
Understanding the Studio Interface in Silhouette
After downloading Silhouette Studio, it is time to learn more about the working area. The interface remains organized and very easy to use, even for a novice. Let us go through some of the major components of the interface so that you can feel more comfortable.
Key Components of the Studio Interface in Silhouette:
| Section | Function |
| Design Area | The main canvas where you create, arrange, and view your project. |
| Tool Panel (Left) | Offers tools like select, draw, erase, line, and shape tools. |
| Quick Access Toolbar | Located at the top; contains shortcut buttons for save, undo, zoom, etc. |
| Send Panel | Used to send your finished design to the cutting machine. |
| Panels on Right | Includes Fill Color, Line Style, Text Style, and Layers to modify your work. |
| Page Setup Panel | Allows you to set up your material size, orientation, and cutting mat. |
Creating Your First Design
Once we understand the layout, we will create a simple project in Silhouette Studio. Whether you cut text and shapes or import an image, cutting is easy.
Step by Step: Creating a Simple Cutting Design
Open a new project
Start by going to ‘File’ > ‘New’ to create a clean workspace.
Configure your page
You can use the right-side Page Setup Panel to select the size of your material, the cutting mat, and the orientation.
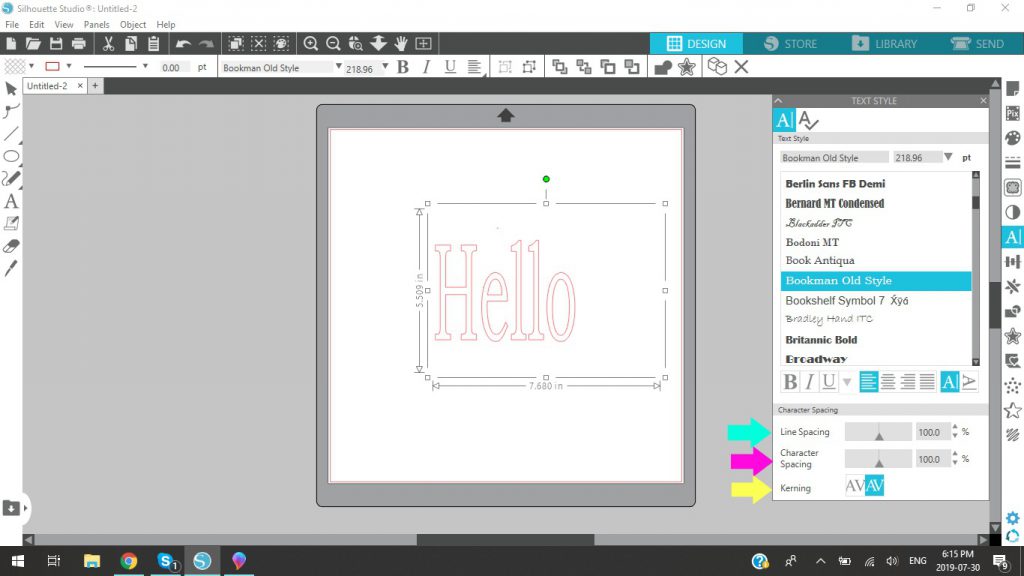
Draw or add text
- Tap the text tool (an icon) to insert your own words.
- Use the tool to create squares, circles, or polygons.
Customize your design
- Use the fill panel to include colors.
- Use size, alignment, or spacing adjustments with the transformation panel.
- Choose source or line styles from the text style panel when working with text.
Group and align
Group objects together so they are easy to move. Use the align tool to center the items on your material where needed.
Save your file
Go to File > Save As and select the .studio3 format (standard for Silhouette Design Studio).
This easy-to-use design process shows how intuitive and pleasant the Silhouette Studio can be, especially for new users.
Submitting Your Design to Cut
Once you are ready with your design, the next step is to cut your design using your silhouette cutting machine. Silhouette Studio will make this whole procedure easier, and you can select the material, organize tools, and cut settings.
Steps to Cut Your Design:
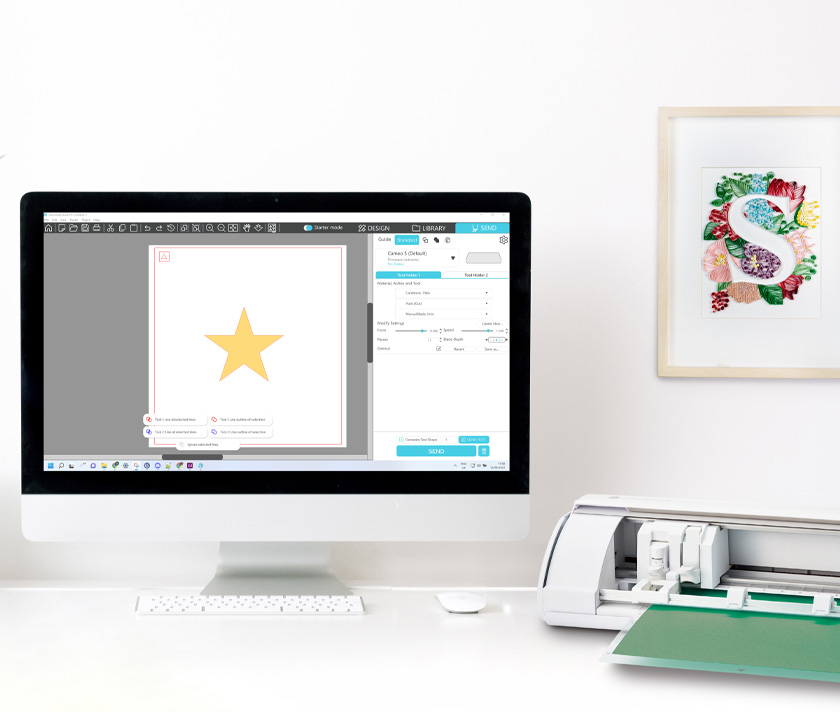
Click on the ‘Send’ tab
This is in the upper right corner of your working space. It switches from design mode to cut configuration mode.
Select your type of material
Use the material configuration to select what you cut—vinyl, cardboard, heat transfer, etc. Based on this selection, Silhouette Studio will automatically apply standard settings.
Check the tool settings
Make sure the kind of blade is the same as the software fills in (Autoblade, Ratchet Blade, etc.). If you have an auto blade, a machine will adjust to it automatically.
Modify cutting settings (if necessary)
Manual adjustment of force, speed, or passes is possible based on the thickness of your material.
Load the material
Position your material on the cutting rug, align it, and load it on the machine.
Press ‘Send’
Press send to start cutting. The machine will cut your design exactly as displayed on the screen.
This step demonstrates the ease with which Silhouette Studio Download handles digital designs and physical cutting, always providing an ideal output.
Design Using Imported and Purchased Designs At Stores
You don’t have to use only your own designs. Silhouette Studio also allows you to purchase or insert design files via the Silhouette Design Store, which adds some flexibility and fun to your creativity.
Importing Design to Silhouette Studio
Supported file types:
- .studio3 (native file format)
- .svg (Designer Edition and Above)
- .dxf, .png, .jpeg, .bmp, .tiff, .gif
Importing steps of a file:
- Click File> Open or File> Import to the Library
- Find your file and click it
- The design will appear on your screen or in the library and be used again.
Tracing Image Files:
You can use the Trace tool to turn an imported PNG or JPEG into a design ready for cutting. The tool traces the shape so it functions like any other vector graphic.
Purchase Designs From the Design Store in Silhouette
You can browse the silhouette design store within the software:
- Click on the store icon in the upper right corner.
- Log in with your Silhouette account.
- Browse, purchase, and download designs that automatically appear in your library.
With Silhouette Design Studio, you can mix pieces bought with your creativity, allowing unlimited space for creativity.
Save, Export, and Reuse Designs
Silhouette Studio lets you save and reuse designs. This flexibility makes updating past projects or building a design library easy.
Saving your work
To save your file:
- Click File> Save and choose either:
- Save to hard disk: Store the design locally on your computer.
- Save in the library: Saves your design in the Silhouette Cloud library for access on other devices.
- File format:
- Save the .studio3 format to preserve layers, cut settings, and text data.
Export designs (designer edition and above)
If you have the updated version of Silhouette Design Studio, you can export in formats such as:
- .SVG – Great for sharing with other design software
- .PDF – for print-ready versions
- To export:
- File > Save As > Save to Hard Disk > Choose SVG or PDF (if available)
Reusing Projects
Your saved files can be reopened, duplicated, and modified anytime. This is especially useful for:
- Batch creation
- Creating seasonal variations of the same design
- Of size or material adjustments on various projects
When using Silhouette Studio, you do not have to begin at the beginning.
Wrapping Up
Silhouette Studio is computer-assisted design and customization software for silhouette cutting machines. This blog introduces the basics of Silhouette Studio. Start with compatible design files and optimize settings for accuracy. Finally, try materials to adapt to your project. Improve your product using 3D printing methods such as sanding or painting. Silhouette machines and software unlock creative possibilities using ideal tools and settings.
Then you are ready to put your ideas into practice? Get Silhouette Studio today at Silhouette America and make confident creations.